Configuration
Everything you need to install, configure, customize, and get the most out of StreamerKit.
This guide explains how to configure the main features available in StreamerKit.
StreamerKit currently supports Twitch and Kick.
Support for YouTube and TikTok is currently in development.
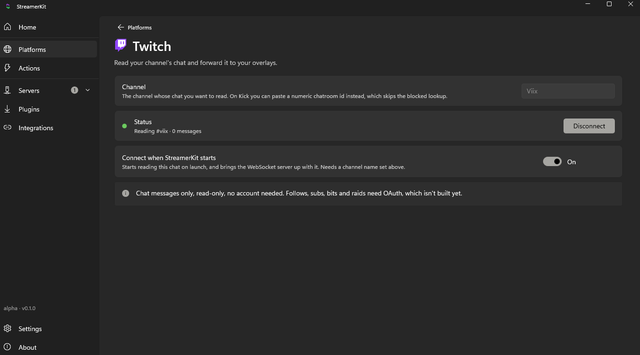
- Enter your Twitch channel name.
- Click Connect.
- Enable or disable Auto Connect.
We recommend keeping Auto Connect enabled so StreamerKit reconnects automatically when the application starts.
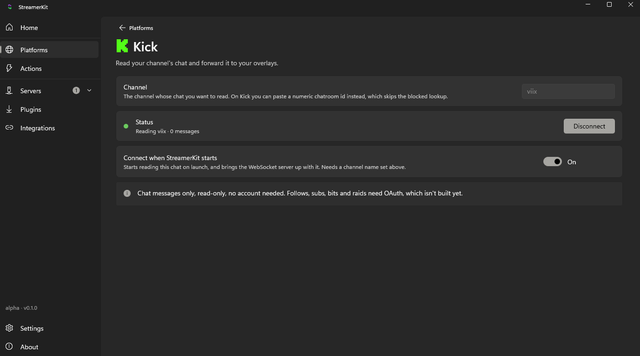
- Enter your Kick channel name.
- Click Connect.
- Enable or disable Auto Connect.
We recommend keeping Auto Connect enabled so StreamerKit reconnects automatically when the application starts.
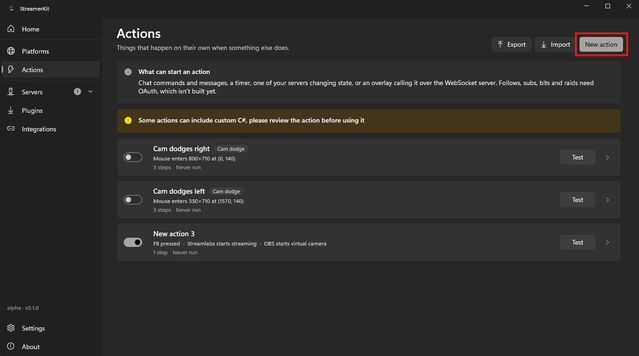
Actions are one of the main features of StreamerKit. They allow you to automate streaming tasks, create shortcuts, and connect triggers to multiple steps.
- Click the New Action button.
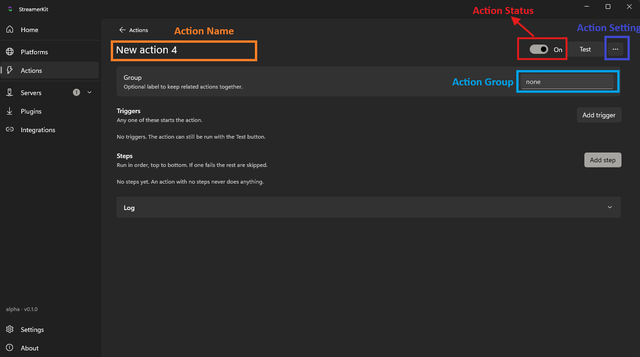
At the top of the Action editor, you will find the following options:
- Action Name: Choose a name that clearly describes what the Action does.
- Action Status: Enable or disable the Action.
- Test Action: Run the Action manually to verify that it works.
- Action Settings: Delete, duplicate, or manage the Action.
- Action Group: Organize Actions into groups such as Chat, Overlays, Recording, or Moderation.
Triggers determine when an Action should run.
Examples include:
- Starting a recording
- Clicking a button
- Running a timer
- Receiving an OBS event
- Receiving a Streamlabs event
Some triggers require an integration to be connected. For example, OBS and Streamlabs triggers will only be available after their corresponding integrations have been configured.
Steps determine what happens after an Action is triggered.
Examples include:
- Sending a Discord message
- Showing or hiding an OBS source
- Switching scenes
- Starting or stopping a recording
- Sending data to an overlay
Many Action steps require an active integration.
Action Logs help you monitor your Actions and troubleshoot problems.
Use the logs to check:
- Whether an Action was triggered
- Which steps were completed
- Whether a step failed
- Why an Action did not run as expected
Importing and exporting allows you to share Actions with other users or use Actions created by the community.
Instead of manually recreating every trigger and step, you can export an existing Action and import it into another StreamerKit installation.
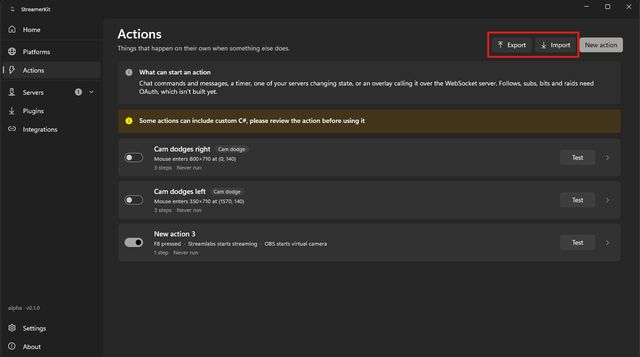
StreamerKit includes several server options for hosting custom overlays and connecting external tools, plugins, and scripts.
App Servers are designed to make hosting custom overlays easier.
They can run overlays built with technologies such as Python or Node.js after those projects have been packaged as executable applications.
This means users do not need to manually install Python, Node.js, or the project's required dependencies.
Currently, only plugins downloaded from the Plugins page can be added to the App Servers page.
StreamerKit provides built-in HTTP, WebSocket, and UDP servers for custom overlays and external applications.
These servers are designed to provide:
- High performance
- Low latency
- Smooth communication between StreamerKit and your overlays
The built-in WebSocket server also supports Streamer.bot-compatible custom overlays, including overlays created by Nutty.
Custom WebSocket Servers and Clients are intended for advanced setups that require more than one WebSocket connection.
They can be used with:
- Custom plugins
- Overlays
- Scripts
- External applications
- Tools that require custom connection settings
You can create multiple WebSocket servers and clients, each with its own configuration.
The Plugins page is currently under development.
More information will be added as plugin support becomes available.
StreamerKit currently supports the following integrations:
- OBS Studio
- Streamlabs
- Discord
Support for Stream Deck is currently in development.
Follow these steps to connect OBS Studio to StreamerKit.
- Open OBS Studio.
- Go to Tools → WebSocket Server Settings.
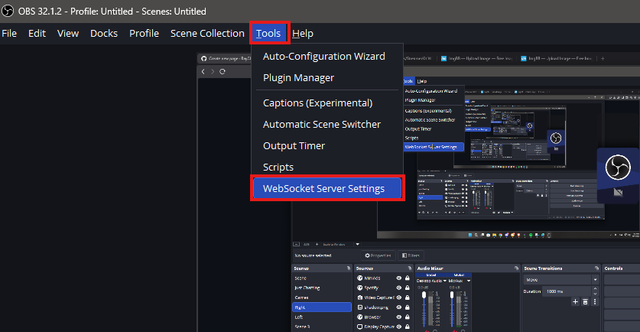
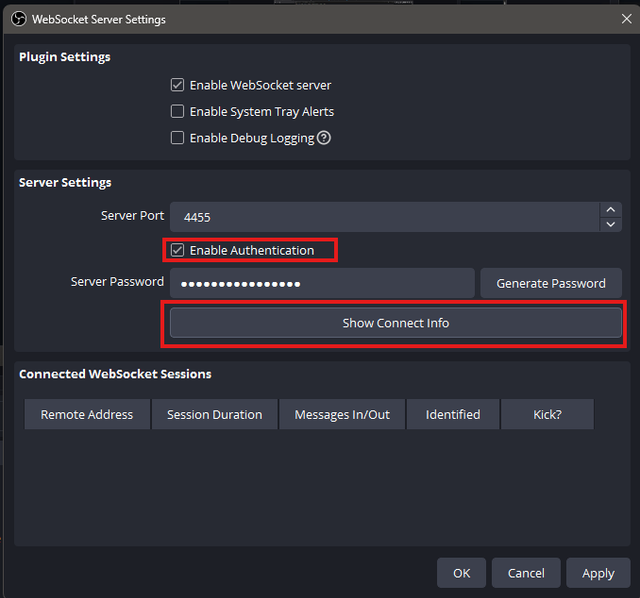
- Enable WebSocket Server.
- Enable Authentication.
- Click Show Connect Info.
- Copy the Server Password.
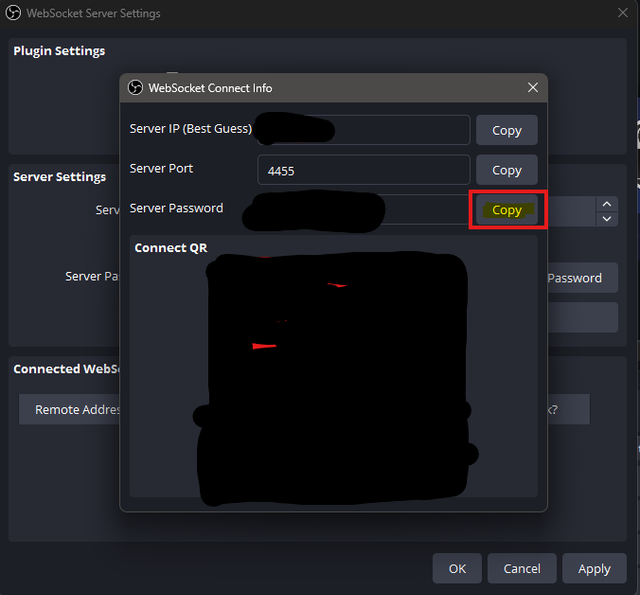
- Open StreamerKit.
- Go to Integrations → OBS.
- Paste the OBS WebSocket password.
- Click Connect.
- Enable Connect when StreamerKit starts.
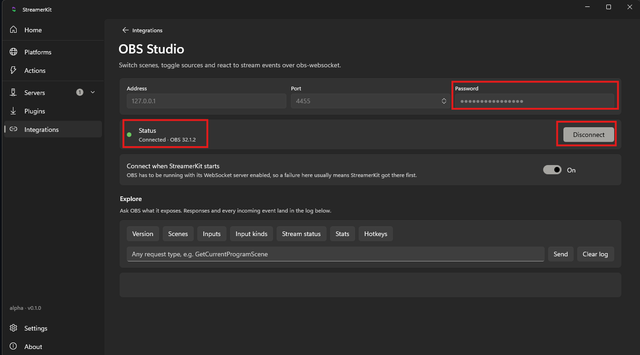
StreamerKit should now connect to OBS automatically whenever the application starts.
Follow these steps to connect Streamlabs to StreamerKit.
- Open Streamlabs Desktop.
- Open Settings.
- Select Mobile.
- Enable Third-Party Connections.
- Copy the API Token.
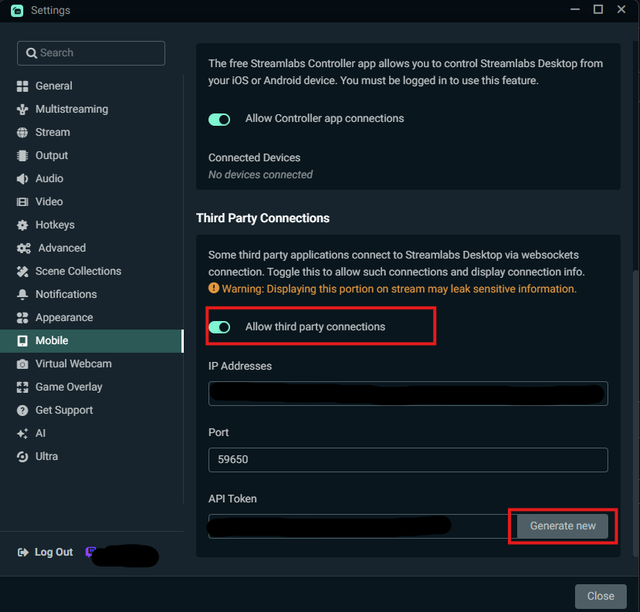
- Open StreamerKit.
- Go to Integrations → Streamlabs.
- Paste the API Token.
- Click Connect.
- Enable Connect when StreamerKit starts.
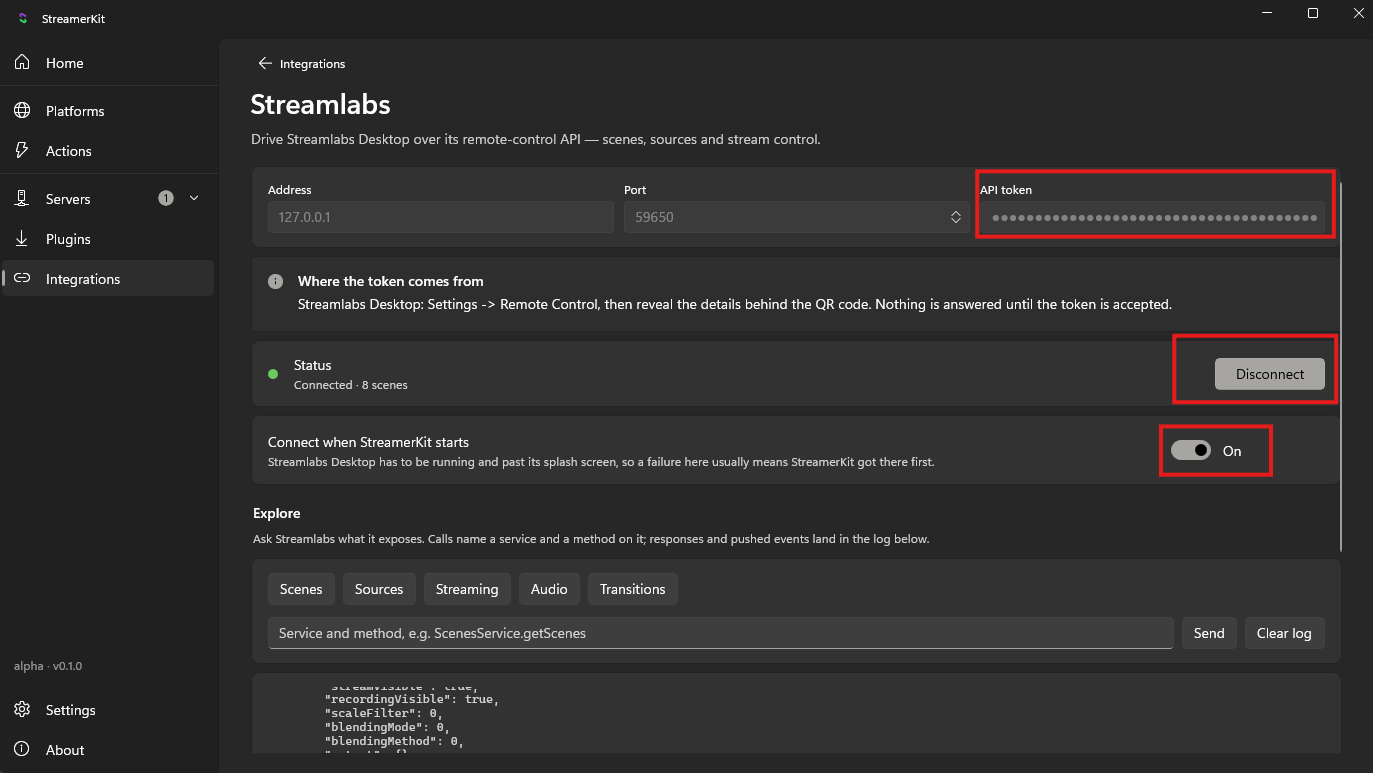
StreamerKit should now connect to Streamlabs automatically whenever the application starts.